I'm currently in the process of setting up a new system. I'm using a 275 gal IBC container with 4 half barrels and a 4' x 4' x 7" flood table that tend to use as a floating raft system I have a 55 gallon barrel partially buried in the ground below my half barrels GB so the will drain into it, I have a 1000 gallon per hour pump that will return the water back to the FT.My setup is a CHIFT & PIST. I also plan on adding a 55 gallon Bio filter setup to the system in the future. My question right now has to do with the Bell Siphon setup. I've read many different threads on this subject. I've designed 2 different bell siphons one with a line coming from the top and zip tied to the side just above the bottom of the bell and the other without utilizing a 1 & 1/2" standpipe to a 2" wide mouth with a 3" dia Bell, I'm still having a problem with the breaking of the siphon on both designs. I also have to put some kind of weight on top of the bells to get the siphon to start, Is this normal? Is it because of the curved bottom of the barrels? How does the flow rate affect the bell siphons? I do have ball valves on the feeds. I'm trying to get them working without putting in the Hydrton in GB but this also seems like the grow media will take up a lot of the volume and will effect the flow rate also. Any help I would appreciate.
Results 1 to 9 of 9
Thread: Bell Siphon
-
05-03-2010, 07:29 AM #1Members

- Join Date
- Apr 2010
- Posts
- 3
Bell Siphon
-
05-03-2010, 08:07 AM #2
Re: Bell Siphon
I use 1 ˝ stand pipe with a 3” bell. The flow has a lot to do with starting and stopping. Too much flow and the bell won’t stop and to little flow it won’t start. I have never tried a stand pipe flange before, but I have with some successes used a slight upward angle on the discharge pipe. GOOD LUCK, stucco
Unless someone like you cares a whole awful lot, nothing is going to get better. It's not.-- Dr. Seuss, The Lorax
Simplicity of character is the natural result of profound thought~fortune cookie
-
05-12-2010, 12:45 PM #3
Re: Bell Siphon
Check out this link for a great bell siphon, maybe it will solve your problems.

Great bell valve construction video..!JCO
Irish eyes are always smiling but- "In the eyes of the world, you are only as good as your last success"
- "MAN IS ONLY LIMITED BY HIS IMAGINATION"
-
05-12-2010, 01:09 PM #4Members

- Join Date
- May 2010
- Location
- Dallas, TX
- Posts
- 37
Re: Bell Siphon
In my little system, I have two bell siphons (one in each half-barrel) -- each one uses 0.5" standpipe with a 1.5" bell and a 3" surround sleeve.
Also my feed into the beds is via 0.5" pvc, each with a ball valve so I can vary the flow if needed.
While I have varied the heights of the standpipe based on the amount of media in each bed, the basic design is the same and they both work great. The taller one takes ~16 minutes to flood the half-barrel and ~4 minutes to drain; the shorter takes ~10 minutes to flood and ~2 minutes to drain...
Phoenix
-
05-12-2010, 08:13 PM #5
Re: Bell Siphon
When I had GBs tall enough to use it, my bell siphon worked great .... it uses a 1" stand pipe, and a 2" outer surround, with the Aquarium airline siphon break tube zipped to the side .... I might be able to find the place where I got the instructions, or measure mine if needed
 I use the Linux Operating System ...... Free as in beer!
You're never too old to learn something
Aquaponics - food'n'fish at your doorstep
Helena, Montana - Home of the Northernmost Monument to the Confederacy
-
08-08-2010, 06:11 PM #6
Re: Bell Siphon
Here is my Bell siphon/ growbed how to:
I start with a 30 gallon plastic barrel I get for free from the car wash. I cut off the top with the buttress thread fitting so that the barrel is 12" deep. I cut a 2" hole in the bottom for a bulkhead fitting for a 1" PVC pipe.
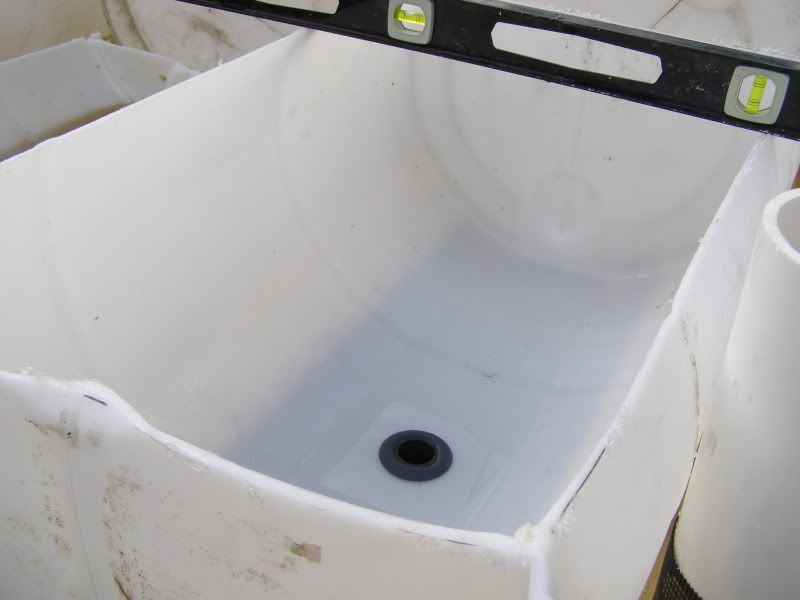
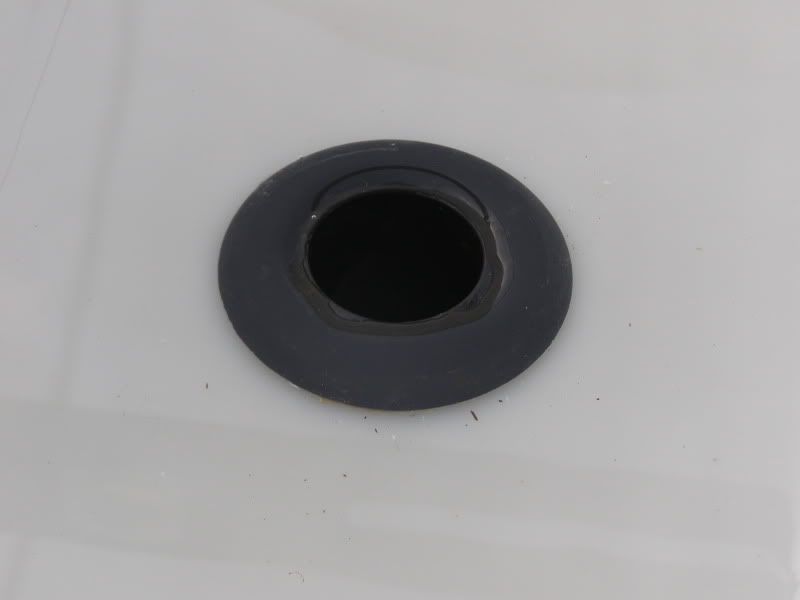
Next I cut a section of 1" PVC pipe long enough to reach 3.5" from the top of barrel.
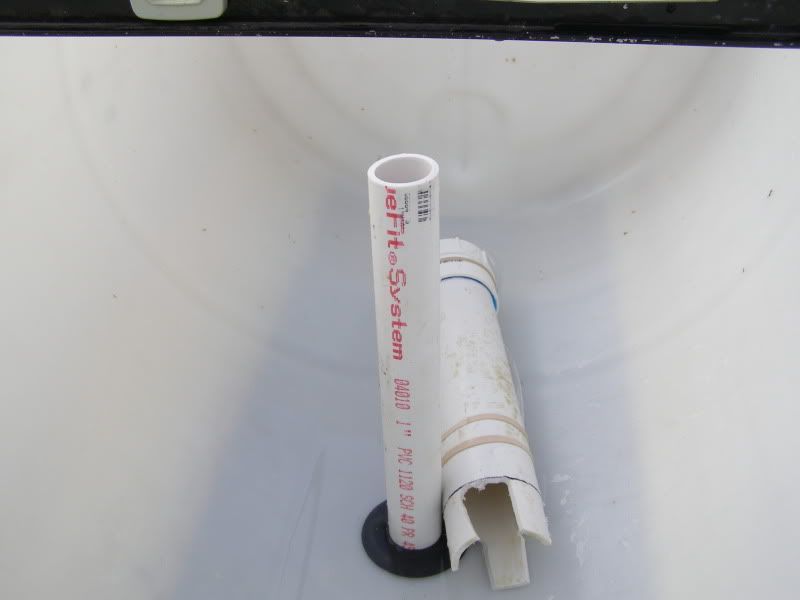
I made the bell housing from 2" PVC pipe, a 2" threading cleanout cap, a cleanout cap, and 1/4" clear plastic tubing.

In my prototype I drilled a 1/4" hole in the side of the cap and glued in the tubing. It just goes in the cap so it is open to the middle of the cap. It is run down the side of the bell cover and I temporarily secured it with rubber bands. I'll work out something to hold it in place later. This is a working prototype. The bottom is notched out with a router 1.5" prom the bottom. The top of the cap is 11.5" from the bottom. The clear plastic tubing extend down to .5" above the notch.
Next I made a strainer from 4" PVC pipe 12" long:
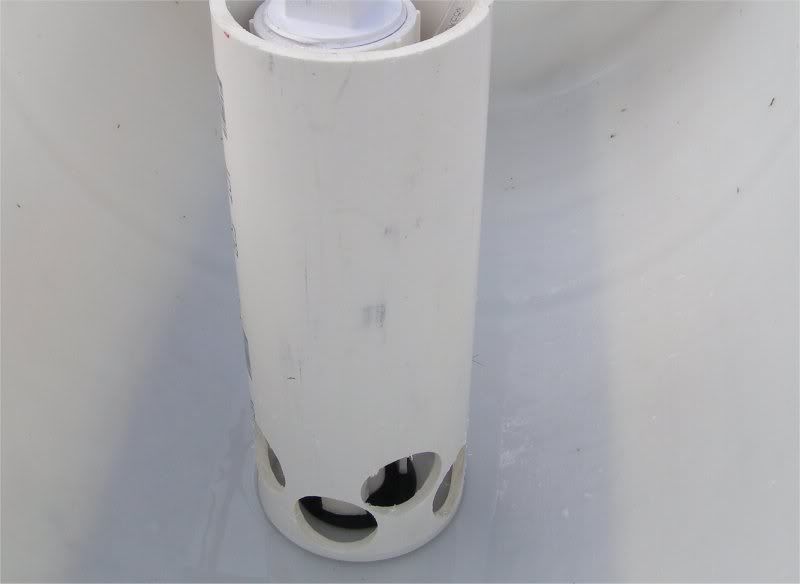
I drilled 2" holes in it at the bottom. The bottom is covered with 4" screen pipe to keep the gravel out. The gravel holds it in place. I did not glue it to the bottom, but probably will in the production run. It shifted off center as I added the gravel, but it did not effect the operation of the unit.
I used river gravel from Home Depot for my prototype bed. It is too expensive for my production run, so I'll get the rest from the quarry. It took 3.5 cubic feed to fill the barrel.
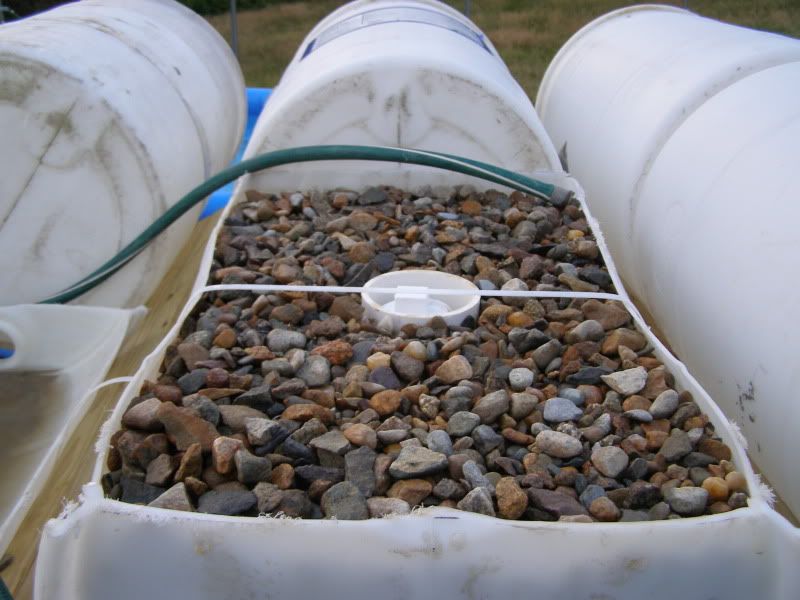
You can see the outer strainer with the bell siphon inside. The zip strap keeps the sides from bowing out.
The siphon drains the barrel to 2" from the bottom and triggers at 11" from the bottom. It drains in a little over a minute. I tested it with a fill rate of .5 gallons per minute. That took just a little under 10 minutes to fill. I'll be playing with the fill rate to see "How Low Can You Go" and still trigger.
All in all it was a very satisfying afternoon.The best fertilizer is the farmer's shadow
-
08-11-2010, 05:50 AM #7
Re: Bell Siphon
I use zip ties to hold the tubing in place and these adapters work great for attaching the tubing. That way you don’t have to remove the whole thing for cleaning. Or when it gets dirty just add some new line.
Unless someone like you cares a whole awful lot, nothing is going to get better. It's not.-- Dr. Seuss, The Lorax
Simplicity of character is the natural result of profound thought~fortune cookie
-
08-11-2010, 11:37 AM #8
Re: Bell Siphon
The tubing just crushed when I used zip ties. I'll use a ferrule I think. With 1/4" tubing and a 1/4" hole the fit is tight and needs no glue. Easy to pull out & put back in.
The best fertilizer is the farmer's shadow
-
02-26-2011, 04:53 PM #9Members

- Join Date
- Feb 2011
- Location
- Bloomingburg NY
- Posts
- 9
Re: Bell Siphon
Cool, I thought those looked like zip ties in the other thread. Great idea!
I think you might want to replace them with black zip ties though. The white ones will get brittle and break after prolonged exposure to the sun. The black ones seem to last "forever".
Also, looks like your using thick walled 1" PVC. Thin walled is cheaper and will give you a greater inside diameter.
Similar Threads
-
Bell Siphon issues
By flienlow in forum Want To Know HOW TO..?Replies: 27Last Post: 01-01-2020, 01:44 PM -
A cucumber ate my bell siphon!
By bsfman in forum Veggies in GeneralReplies: 4Last Post: 10-24-2012, 05:41 AM -
Size of bell siphon
By kkedge in forum Commercial SystemsReplies: 1Last Post: 12-15-2011, 06:27 AM -
Question about Bell Siphon
By ButtonLife in forum Want To Know HOW TO..?Replies: 7Last Post: 10-22-2011, 10:49 AM -
Help with Bell Siphon
By Fish Frenzy in forum General HardwareReplies: 9Last Post: 01-31-2011, 05:02 PM


 Reply With Quote


